Navigating the world of newborn care often presents new parents with a unique set of challenges and learning opportunities. One of the most frequent tasks you will encounter involves diaper changes, which can sometimes feel overwhelming. Many new mothers frequently grapple with understanding when to change a diaper or how to prevent those infamous, messy blowouts.
Fortunately, simple yet effective solutions exist to make these daily routines much smoother. The helpful video above offers a couple of quick yet powerful diaper hacks that every mom should definitely know. This accompanying guide will delve deeper into these practical tips and introduce even more strategies to simplify your diapering journey, ensuring you feel more confident and prepared.
Understanding Your Baby’s Diaper Wetness Indicator
The video correctly highlights a fantastic feature on many disposable diapers: the yellow line that transforms into a distinctive blue color. This clever indicator visually signals when a diaper is full and subsequently needs to be changed. For new parents, this small detail becomes an invaluable tool, eliminating the guesswork associated with keeping your baby comfortable and dry.
The Science Behind the Color Change
This ingenious wetness indicator line works due to specialized chemicals embedded within the diaper’s inner lining. These chemicals react upon contact with moisture, causing a noticeable color transformation from yellow to blue. This visual cue provides a clear, unmistakable sign that your baby’s diaper has absorbed enough liquid and needs attention. Research indicates that using such indicators can reduce the time parents spend checking diapers by touch, making the process more efficient.
While incredibly helpful, it is important to remember that this indicator typically responds to urine. It may not always change for a bowel movement, so occasional physical checks remain necessary. Newborns generally require diaper changes every 2-3 hours, or even more frequently, especially after feedings. Studies suggest infants can go through up to 10-12 diapers daily in their first few weeks, emphasizing the constant need for vigilance.
Preventing Messy Diaper Blowouts Effectively
One of the most dreaded occurrences for any parent is the dreaded diaper blowout, which often leads to extensive cleanup and wardrobe changes. The video provides an excellent tip regarding stretching the diaper pants from the sides to prevent these messy events. This simple action directly addresses a common cause of leakage.
Proper Diaper Fit and Adjustment
Ensuring your baby’s diaper fits correctly is paramount for preventing blowouts. When you stretch the diaper pants, you are ensuring the elastic gathers around the legs and waist are properly extended and snug against your baby’s skin. A diaper that is too loose or improperly adjusted can easily allow contents to escape.
After placing the diaper on your baby, run your fingers around the leg openings to make sure the ruffles are pulled out and not tucked in. These ruffles act as a crucial barrier against leaks. Furthermore, confirm that the waist tabs are securely fastened but not overly tight; you should be able to comfortably slide two fingers under the waistband. Approximately 60% of diaper leaks are attributed to an improper fit or application, highlighting the significance of this step.
Additional Strategies for Blowout Protection
Beyond stretching the sides, several other strategies can help minimize the risk of a blowout. Always ensure you are using the correct diaper size for your baby’s current weight, as an ill-fitting diaper will significantly increase the chances of leaks. Some studies show that sizing up by one size at night can reduce overnight blowouts by nearly 40%.
Consider using diapers designed with a “blowout barrier” or a deeper pocket at the back, which provides extra containment. For babies who frequently have explosive bowel movements, laying them on their side for a moment after a feeding can sometimes allow gas to escape, reducing pressure inside the diaper. Being proactive with these simple tips can dramatically reduce the frequency of unpleasant cleanup situations.
More Ingenious Diaper Hacks for Smoother Changes
Beyond the fundamental tips shared in the video, many additional diaper hacks can significantly streamline your daily baby care routine. Implementing these smart strategies will not only save you time but also reduce stress, allowing for more precious bonding moments with your little one.
Organizing Your Diaper Changing Station
A well-organized changing station is a game-changer for efficient diaper changes. Keep all your essentials within arm’s reach: diapers, wipes, diaper cream, and a spare change of clothes. Many parents find using a portable caddy beneficial, allowing them to move supplies easily between different rooms or levels of their home. According to parenting surveys, organized changing stations can cut diaper changing time by an average of 15%.
Consider preparing multiple changing stations if your home has more than one floor or a frequently used living area. This simple setup avoids the need to run up and down stairs for supplies, making spontaneous changes much easier. Having everything ready means you can focus entirely on your baby, ensuring safety and comfort during each change.
Speedy Diaper Disposal Techniques
Dealing with dirty diapers efficiently is another key aspect of smart diapering. For soiled diapers, always roll them up tightly, securing them with the diaper tabs to contain any mess or odor. Many parents opt for a dedicated diaper pail equipped with an odor-locking system, which is far more effective than a regular trash can at keeping unpleasant smells contained. Research suggests that a specialized diaper pail can reduce odors by up to 95% compared to standard bins.
Alternatively, keeping a roll of small plastic bags (like dog waste bags or scented disposal bags) near the changing station can be incredibly useful. These are perfect for sealing individual soiled diapers, especially when you are away from home or simply want an extra layer of odor control before placing them in the main trash.
Tackling Diaper Rash Proactively
Diaper rash is a common concern for infants, but it can often be prevented with consistent proactive measures. Changing diapers promptly, especially after bowel movements, is the first line of defense. Allowing your baby’s bottom to air dry for a few minutes during changes can also significantly reduce moisture, a primary cause of rash. Studies indicate that air exposure for just 5 minutes per change can decrease rash incidence by 25%.
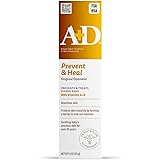
Applying a thick layer of barrier cream, such as zinc oxide or petroleum jelly, at every change creates a protective shield against wetness and irritants. This barrier prevents moisture from reaching the skin, keeping it healthy and smooth. Consistent application is key to preventing rash outbreaks and ensuring your baby’s comfort.
The Broader Benefits of Effective Diapering
Adopting these practical diaper hacks offers benefits that extend far beyond simply keeping your baby clean. By streamlining the diaper changing process, parents can reduce their stress levels and reclaim valuable time. Efficient changes mean less fussing for your baby, contributing to their overall comfort and a calmer environment. This also frees up more moments for engaging in play, cuddling, and other enriching interactions.
Diaper Hacks & Beyond: Your Questions Answered
What is a diaper wetness indicator?
A diaper wetness indicator is a yellow line found on many disposable diapers that changes to a blue color when the diaper is full of urine, letting you know it’s time for a change.
How can I prevent messy diaper blowouts?
To help prevent blowouts, ensure the diaper fits correctly by stretching the sides and making sure the leg ruffles are pulled out and not tucked in. The waist tabs should be snug but allow two fingers to slide underneath.
How often should I change my newborn’s diaper?
Newborns typically need their diapers changed every 2-3 hours. You should also change them more frequently, especially after feedings or bowel movements.
What are some ways to prevent diaper rash?
To prevent diaper rash, change diapers promptly, allow your baby’s bottom to air dry for a few minutes during changes, and apply a thick layer of barrier cream like zinc oxide with each diaper change.