The journey of parenthood is filled with countless firsts, and for many new moms and dads, the idea of changing a baby’s diaper can feel surprisingly daunting. Perhaps you’ve had a moment where you’re holding your precious little one, a mysterious “surprise” brewing, and a sudden wave of panic washes over you: “Am I doing this right? What if I mess it up?” It’s a common sentiment, but as Dra. Pia wisely shares in the video above, proper diaper changing is actually quite simple. It all comes down to preparation, technique, and a little bit of confidence. Let’s delve deeper into mastering this essential baby care skill, ensuring your little one stays clean, comfortable, and healthy.
Setting the Scene: Creating a Safe and Ready Diaper Changing Station
Before you even unstrap the diaper, ensuring the environment is safe and all necessities are within arm’s reach is paramount. Imagine needing a wipe, and it’s just out of reach while your baby is wriggling. This is a common scenario that can lead to spills or, worse, safety hazards. A dedicated diaper changing station is not just a convenience; it’s a critical safety measure.
Prioritizing Safety During Diaper Changes
The first rule of diaper changing is simple: never leave your baby unattended, even for a second. Babies, even newborns, can surprise you with unexpected rolls or movements. If you’re using a changing table, always use the safety straps if available. However, these are merely a backup; your hand should always remain on your baby. Many parents opt to change diapers on a mat on the floor, which eliminates the risk of falls entirely. This can be a particularly wise choice for more active infants, like six-month-old Julian, who might be prone to sudden kicks and turns.
Assembling Your Essential Diaper Changing Supplies
Having everything organized and accessible before you start is key to a smooth and hygienic diaper changing experience. Think of it like a medical procedure; you wouldn’t start without all your instruments. Here’s a comprehensive list of what you’ll need, expanding on Dra. Pia’s recommendations:
- A Comfortable Changing Surface: This could be a dedicated changing pad with a waterproof cover, a soft mat, or even a clean towel spread on the floor. Comfort is important for the baby, and an easy-to-clean surface is crucial for you.
- Clean Diapers: Always have a fresh diaper ready and unfolded. It’s wise to keep an extra one nearby, just in case.
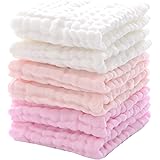
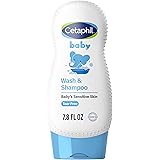
- Wipes or Cotton Balls/Pads with Water: For cleaning, wet wipes are convenient. Choose unscented, hypoallergenic varieties, especially for newborns or babies with sensitive skin. Alternatively, as Dra. Pia suggests, wet cotton balls or pads with clean, boiled, and cooled water are excellent for very delicate skin, offering a gentler, chemical-free clean.
- Diaper Rash Cream: Have your preferred diaper rash cream on hand. Whether it’s a barrier cream like zinc oxide or petroleum jelly for prevention, or a medicated cream for existing rashes, prompt application is beneficial.
- Hand Sanitizer or Alcohol: Even if you wash your hands before, having a quick sanitizer nearby for post-change can be very helpful, especially if you’re away from a sink.
- A Designated Diaper Pail or Bag: A place to immediately dispose of the soiled diaper helps manage odors and hygiene. Small disposable bags are perfect for travel or for containing particularly messy diapers.
Mastering the Art of Diaper Changing: Step-by-Step
With your station prepped, you’re ready to perform the actual diaper change. This process becomes second nature quickly, but focusing on technique, especially for cleaning, is vital for your baby’s health.
Beginning with Clean Hands
Just like any interaction with a baby, especially involving their delicate areas, clean hands are the first step. Washing your hands thoroughly with soap and water, or using an alcohol-based hand sanitizer, prevents the transfer of germs to your baby’s sensitive skin. This simple act drastically reduces the risk of infection.
Removing and Containing the Soiled Diaper
Gently unfasten the tabs of the soiled diaper. If your baby has only wet, you can carefully fold the front part down and slide the new diaper underneath their bottom before removal. For soiled diapers, Dra. Pia advises using the clean front portion of the diaper to gently wipe away any solid waste from your baby’s bottom towards the feet. This helps contain the mess. Then, fold the soiled diaper inwards, creating a compact bundle. Secure it with the original tabs and place it away from the baby, ready for immediate disposal.
Thorough Cleaning: The Front-to-Back Rule
This is arguably the most crucial step for preventing infections, particularly for baby girls. Using fresh wipes or wet cotton, gently clean your baby’s bottom. The golden rule is always to wipe from front to back. This technique ensures that any fecal matter is swept away from the genital area, drastically reducing the chance of bacteria entering the urinary tract or causing other infections. Use a fresh wipe or cotton ball for each stroke, disposing of it immediately after use to avoid re-contaminating the area. Pay special attention to all skin folds, creases in the thighs, and around the genitals, as these areas can trap moisture and debris. Gently lift your baby’s legs by the ankles to access all areas effectively.
Addressing and Preventing Diaper Rash
After cleaning, take a moment to observe your baby’s skin. Look for any signs of redness, irritation, or bumps. If you notice any, or if your baby is prone to rashes, apply a thin layer of diaper rash cream. Zinc oxide creams create a protective barrier against moisture, while petroleum jelly can soothe and prevent chafing. For more persistent rashes, consulting with your pediatrician for specific recommendations, perhaps an antifungal cream, is advisable. Ensuring the area is completely dry before applying cream and putting on a new diaper is also important, as moisture contributes to rash development.
Putting on a Fresh Diaper and Special Newborn Considerations
Now, it’s time for the clean diaper. Slide the fresh diaper underneath your baby’s bottom, ensuring the tape tabs are at the back. Pull the front of the diaper up between your baby’s legs, then fasten the tabs securely. The fit should be snug but not too tight – you should be able to comfortably slide two fingers under the waistband. A properly fitted diaper prevents leaks and allows for comfortable movement.
Caring for a Newborn’s Umbilical Cord Stump
For newborn babies, there’s an extra, yet temporary, consideration: the umbilical cord stump. As Dra. Pia highlights, it’s vital to keep this area dry and exposed to air to promote healing and prevent bacterial growth. When fastening the diaper, fold down the front part so that it sits below the umbilical cord stump. Many newborn-sized diapers have a cutout specifically for this purpose. Avoid covering the stump with the diaper or clothing, as moisture and friction can delay healing or lead to infection. The stump typically dries up and falls off within one to three weeks. Once it’s gone and the area is fully healed, you can diaper normally.
Beyond the Basics: Enhancing Diaper Changing Routines
While the fundamental steps remain constant, there are always ways to make the diaper changing experience more pleasant and efficient for both you and your baby. Incorporating these tips can turn a routine task into a moment of bonding.
Engaging Your Baby During Diaper Changes
Diaper changes can be more than just a functional task. Use this time to connect with your baby. Talk to them, sing a lullaby, or make silly faces. Older babies like Julian might enjoy a small, safe toy to hold and distract them. This interaction can make the process less stressful for a squirmy baby and more enjoyable for you.
Understanding Diaper Changing Frequency
Newborns generally need their diapers changed every 2-3 hours, or immediately after every bowel movement. As they grow, the frequency may decrease slightly, but checking diapers regularly is important. Wetness indicators on disposable diapers can be a helpful visual cue. Prompt changing helps prevent diaper rash and keeps your baby comfortable.
Troubleshooting Common Diaper Changing Challenges
- The “Explosion” Diaper: Sometimes, things get extra messy. Don’t panic. Gently roll your baby onto their side, clean the worst of it with the diaper itself, then use an abundance of wipes or wet cotton. A warm washcloth might also be useful for really sticky situations.
- The Squirmy Baby: Babies around Julian’s age (six months) become very mobile. Distraction with a toy, singing, or even a changing pad cover with engaging patterns can help. Sometimes, a quick change on the floor is easier for a very active baby.
- Diaper Leaks: Ensure the diaper is fitted correctly – snug but not too tight, with the ruffles around the legs pulled out. Check sizing; if your baby is between sizes, often going up a size can help with absorbency and fit.
Mastering diaper changing is a cornerstone of early parenting. By following these steps and maintaining a watchful eye, you’ll not only ensure your baby’s comfort and hygiene but also build confidence in your caregiving abilities. Remember, every parent starts somewhere, and with practice, this seemingly daunting task will become just another natural part of your day, a small moment of care that contributes to your baby’s overall well-being.
Pedia’s Diaper Duty: Your Questions Answered
Why is it important to have a dedicated diaper changing station?
A dedicated station ensures all necessary supplies are within reach, preventing you from leaving your baby unattended, which is crucial for their safety.
What essential items do I need for changing a baby’s diaper?
You will need clean diapers, wipes or wet cotton balls, diaper rash cream, hand sanitizer, and a comfortable, easy-to-clean surface for your baby.
What is the most important safety rule during a diaper change?
Never leave your baby unattended on the changing surface, even for a second, as babies can make unexpected movements or rolls.
What is the proper way to clean my baby’s bottom during a diaper change?
Always wipe from front to back, especially for baby girls, using a fresh wipe or cotton for each stroke to prevent the spread of bacteria.
How should I care for a newborn’s umbilical cord stump when changing diapers?
Fold down the front of the diaper so it sits below the cord stump. This keeps the stump dry and exposed to air, which helps it heal properly.