Mastering Newborn Diaper Changes: A Comprehensive Guide for New Parents
Navigating the early days with a newborn presents many beautiful moments, alongside a steep learning curve. Among the most frequent tasks new parents encounter is the diaper change. It is common to feel unsure about the proper technique, especially when considering the delicate nature of a newborn’s skin and the specific needs for baby girls and boys. This guide aims to alleviate those concerns, providing a clear, step-by-step approach to confidently changing your newborn’s diaper, building upon the valuable insights you may have just watched in the accompanying video.
Why Proper Newborn Diaper Changes Are Crucial
Beyond simply keeping your baby dry, effective diaper changing is fundamental to their health and comfort. Improper techniques can lead to discomfort, skin irritation, and potentially more serious issues like diaper rash or infections. Statistics show that up to one-third of infants will experience diaper rash at some point, often due to prolonged exposure to wetness or irritants, underscoring the importance of diligent diaper care.
Furthermore, regular and thorough cleaning contributes significantly to your baby’s overall hygiene. It is an essential component of preventing bacterial growth and maintaining healthy skin. Consequently, understanding and implementing the correct procedures for changing a newborn’s diaper is a vital skill for every caregiver.
Essential Supplies for Every Newborn Diaper Change
Preparation is key to a smooth and hygienic diaper change. Having all necessary items within reach prevents you from leaving your baby unattended, ensuring safety and efficiency. Therefore, assemble your changing station with these indispensable items before beginning the process.
- Clean Diapers: Always have several on hand. Newborns typically require 10-12 diaper changes per day in their first few weeks.
- Baby Wipes: Choose gentle, fragrance-free, and alcohol-free wipes, especially for sensitive newborn skin. Alternatively, cotton balls or soft cloths dampened with warm water are excellent for very delicate skin.
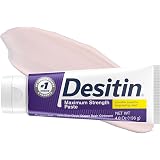
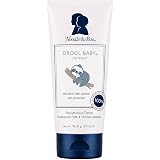
- Diaper Rash Cream or Ointment: A barrier cream (such as one containing zinc oxide or petroleum jelly) is crucial for preventing and treating diaper rash. Apply it proactively if your baby shows any redness or irritation.
- Changing Pad or Mat: A waterproof and easy-to-clean pad or mat provides a soft, sanitary surface for changes. Ensure it has safety straps or raised sides to prevent rolling.
- Fresh Change of Clothes: Blowouts happen. Always have a clean onesie or sleeper nearby for quick changes.
- Small Toy or Distraction: As babies grow, they may become squirmy. A small, safe toy can help keep them entertained during the process.
Step-by-Step Guide to Changing a Newborn’s Diaper
Once your supplies are ready, you can confidently proceed with the diaper change. These steps apply broadly to all newborns, with specific gender considerations detailed in subsequent sections. Maintain a calm and gentle demeanor throughout the process.
- Prepare the Area: Lay your baby on the changing pad. Unfasten the tabs of the dirty diaper, but do not remove it yet. Have your clean diaper open and ready to place underneath your baby.
- Clean the Mess: Lift your baby’s bottom by holding both ankles with one hand. Use the front of the dirty diaper to wipe away any excess stool from front to back. Fold the dirty diaper inward and remove it completely, placing it to the side, away from your baby.
- Thorough Cleaning: Employ fresh wipes or dampened cotton balls to meticulously clean your baby’s diaper area. Always wipe from front to back to prevent the spread of bacteria, especially in girls. Pay attention to all creases and folds in the skin.
- Dry the Skin: Pat the area completely dry with a clean cloth or let it air dry for a moment. Moisture can contribute to diaper rash, so thorough drying is essential.
- Apply Diaper Cream: If needed, apply a thin layer of diaper rash cream or ointment to create a protective barrier. Less is often more with these products.
- Secure the New Diaper: Slide the clean, open diaper under your baby’s bottom, ensuring the tabs are at the back. Pull the front of the diaper up between their legs. Fasten the tabs snugly but not too tightly, ensuring you can still comfortably fit two fingers under the waistband. For newborns, ensure the top edge of the diaper is folded down to keep it below the umbilical stump, allowing it to air out and heal properly.
- Dispose and Wash: Wrap the dirty diaper tightly and dispose of it in a diaper pail or waste bin. Always wash your hands thoroughly with soap and water after every diaper change to prevent the spread of germs.
Specific Considerations for Changing a Baby Girl’s Diaper
When changing a baby girl, particular attention to wiping direction is paramount. Due to their anatomy, improper wiping can easily introduce bacteria from the anus into the urethra or vagina, potentially causing urinary tract infections (UTIs) or yeast infections. Therefore, adherence to front-to-back wiping is non-negotiable.
Focus on cleaning the vulva and the folds of skin around it. Use a fresh part of the wipe or a new wipe for each stroke to avoid reintroducing bacteria. Gentle handling is always advised, and excessive scrubbing should be avoided. The goal is cleanliness without irritation. Maintaining this careful approach contributes significantly to your baby girl’s long-term health and comfort.
Specific Considerations for Changing a Baby Boy’s Diaper
Changing a baby boy’s diaper also requires specific considerations, particularly regarding accidental sprays and hygiene for circumcised or uncircumcised infants. A common, albeit humorous, tip is to cover the penis immediately after opening the diaper, as exposure to cool air often triggers urination. A fresh wipe or small cloth placed over it can save you from a surprise shower.
For Uncircumcised Boys:
For uncircumcised baby boys, the American Academy of Pediatrics advises against forcibly retracting the foreskin. Instead, simply clean around the outside of the foreskin and the scrotum gently. Over time, the foreskin will naturally become retractable, a process that should not be rushed or forced. Maintaining external cleanliness is sufficient during infancy.
For Circumcised Boys:
If your baby boy is circumcised, follow your pediatrician’s instructions for care during the healing process, which typically takes 7-10 days. This often involves applying petroleum jelly to the tip of the penis with each diaper change to prevent it from sticking to the diaper. Be gentle and avoid rubbing the area. Once healed, routine cleaning is sufficient, much like with uncircumcised boys, focusing on the exterior and folds.
Preventing and Managing Diaper Rash
Diaper rash is a common skin irritation that can make your baby uncomfortable. Proactive measures are the best defense. Firstly, frequent diaper changes are essential; wet or soiled diapers should be changed immediately. Newborns may need changing as often as every 1-3 hours. Secondly, ensure the skin is thoroughly dry before applying a new diaper, as moisture is a primary culprit for rash development.
Furthermore, using a barrier cream, like those containing zinc oxide or petroleum jelly, at every diaper change can create a protective layer against wetness and irritants. If a rash does appear, continue frequent changes, meticulous cleaning, and liberal application of a good quality diaper rash cream. In cases of severe rash, or if it persists despite home care, consulting your pediatrician is recommended to rule out fungal infections or other issues. Prompt attention can prevent minor irritation from escalating.
Troubleshooting Common Newborn Diaper Changing Challenges
Even with the best preparation, diaper changes can present minor challenges. For squirmy babies, distraction with a toy or singing a quiet song can be remarkably effective. If your baby dislikes being on their back, try making the process as quick and engaging as possible, using soothing tones. For “blowouts” – when stool escapes the diaper – a quick rinse in a sink under warm running water can be more effective than wipes alone for initial cleaning, followed by a full diaper change and often a wardrobe change.
Remember that every diaper change is an opportunity for a brief moment of connection with your baby. Speak softly, make eye contact, and use gentle touches. This routine can become a special time, fostering bonding while ensuring proper hygiene and comfort for your growing newborn.
Newborn Diapering: Your Questions Answered
Why is it important to properly change a newborn’s diaper?
Proper diaper changing is essential for your baby’s health and comfort. It helps prevent skin irritation, diaper rash, and potential infections, contributing to their overall hygiene.
What are the essential supplies needed for a newborn diaper change?
You will need clean diapers, gentle baby wipes, diaper rash cream, a waterproof changing pad, and sometimes a fresh change of clothes in case of messes.
How often should I change my newborn’s diaper?
Newborns typically require frequent diaper changes, about 10-12 times per day, or every 1-3 hours. It’s important to change wet or soiled diapers immediately.
What is a key cleaning tip when changing a baby girl’s diaper?
Always wipe from front to back when cleaning a baby girl. This prevents bacteria from the anus from entering the urethra or vagina, which can cause infections like UTIs.
How can I help prevent diaper rash on my baby?
To prevent diaper rash, change soiled or wet diapers promptly, ensure your baby’s skin is thoroughly dry before putting on a new diaper, and apply a barrier cream at each change.